Working in a cloud environment, like C-suite, can be very convenient. They provide lots of functionality and tools to get the job done with supporting APIs to programmatically leverage them. But often these tools can have blind spots, as is the case with Google’s Chat API for retrieving Google Task data. An issue tracked on Google’s official issue tracker since November 2020 paints the picture well.
Google Task Data
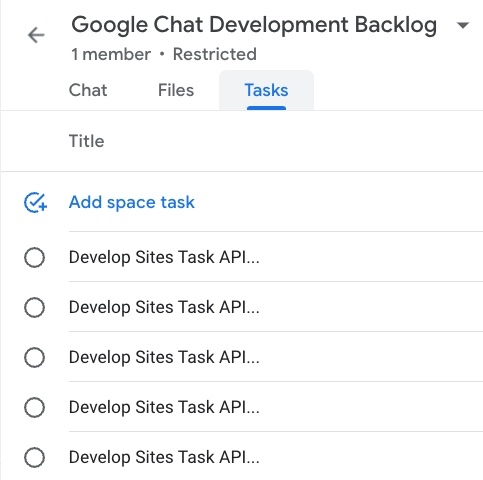
Google Tasks created in the Google Chat/Spaces application (as in the screenshot above) are not visible from within the Tasks API, nor available within the Chat/Spaces APIs.

Google Tasks are quick and easy to develop, and integrated within many G-Suite products, making them a natural choice for task tracking. However, the lack of an API to retrieve Spaces Task statistics has made it difficult to understand how processes using Tasks can be improved and prevents integration with other software, including Google’s own products.
How To Extract Undocumented Google Data
In this blog post, we will outline a simple process that can be used to extract the data from Google’s undocumented API. Automation is left as an exercise to the reader.
Prerequisites For Extracting Google Data
To gain the most benefit from this article, you should prepare yourself with the following information:
- Understand the basics of HTTP, and how to view network traffic using either your browser’s Developer Tools or an intercepting proxy like Burp Suite.
- Understand the basics of JSON, and how to use the jq tool to process JSON-formatted data.
Step 1: Pull Completed Google Task Data
Using Burp Suite as an intercepting proxy, or by using your browser’s Developer Tools Networking (make sure to enable the “Preserve log” option to maintain logs between pages), browse to your Google Chat application and access the Space that contains your tasks. You’re looking for a POST request to the following URL, which is used to populate the application:
https://chat.google.com/u/0/_/DynamiteWebUi/data/batchexecuteThe server’s response is a JSON object with nested JSON within it. This includes both the Google Task-specific data, as well as all the other history for the Space:
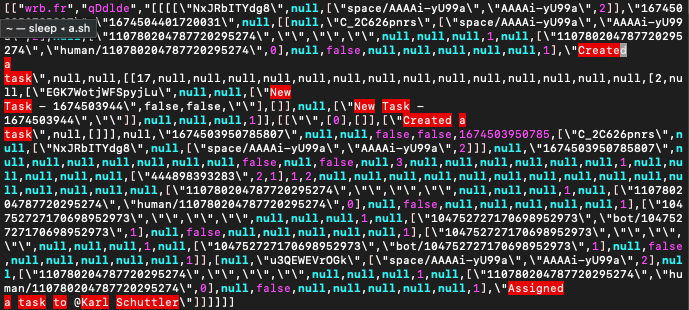
As you can see, the JSON itself is a real mess, with few or no keys used within arrays. This means that nearly all the arrays we reference will need to use numeric indices and that we’ll need to reverse-engineer the blob to figure out which indices reference the information that we need.
To make this easier on yourself, you can click the “Load more” button below your Completed Tasks list.

This will kick off another request to the same URL with the “SOV0tb” Remote Procedure Call code:

As seen above, the JSON blob should now only contain information on the completed tasks.
Copy the entire JSON object and write it to a new file. In our environment, we had around 2,000 completed tasks. The full JSON blob took up more memory than was supported by vim for a single line, so I used MacOS’s pbpaste command line tool to write it to a new file, and then used jq to create a human-readable version:
pbpaste > space-tasks.json
cat space-tasks.json | jq '.' > space-tasks.pretty.json
Step 2: Pull Google User Data
Within the Spaces Task data, you might notice a lack of usernames. Google uses a 21-digit number to specify the user, e.g., 110770314727724595214. While interacting with Chat, you should see frequent POST requests to https://chat.google.com/u/0/_/DynamiteWebUi/idv/. The f_uid body parameter will specify your own User ID number, which you can then use to search your proxy history if you are using Burp.
Alternatively, you can also search your proxy history for your G-Suite email address or the email address of a colleague. You should find another POST request to the same batchexecute URI, with the “vWUT9” RPC code. The response will contain a JSON blob of the users in your domain, along with the User ID number and link to their profile image. Just as we did before, copy the full JSON array, paste it into a new file, and use jq to create a new pretty-formatted file.
Step 3: Extract Google User Data
Now we need to use jq to extract the user data values we’re interested in. For my use case, I wanted to extract the email address and the numeric User ID. Because the JSON is poorly formatted for human reading, it is helpful to use jq’s –stream option as detailed here to transform the file. This command will provide the JSON paths for all values in the file, which reveal the array indices needed to access them:
cat users.pretty.json| jq --stream -r 'select(.[1]|scalars!=null) | "\(.[0]|join(".")): \(.[1]|tojson)"' > users.paths.json
On your own file, you’re trying to identify a JSON path that has both your email address and User ID. In this case, it’s 0.8.1.4.10.0, with the sub-path .0.8 containing the user ID and .1 containing the email address. If we scroll through the file, we’d find that the second path element (the 8 in 0.8.1.4.10.0) increments for each new user, so we simply need to iterate over that value to iterate through every user. We do that by omitting its array index, as in the following command:
cat users.pretty.json| jq -r '.[0][] | [.[1][4]["10"][0][1], .[1][4]["10"][0][0][8]]'You’ll notice that the output filter has also been wrapped in square brackets. This command returns a series of arrays, each containing the email address as their first element and the associated user id as the second element. We can include an additional filter with the @tsv function to convert the arrays into tab-separated values, which will be easier to work with (e.g., in Excel):
jq -r '.[0][] | [.[1][4]["10"][0][1], .[1][4]["10"][0][0][8]] | @tsv'Sample obfuscated output:

Step 4. Extract Completed Google Task Data
We’ll follow the same steps as before to extract the task name, creation time, and User ID of the task completer from the task data:
jq -r '.[0][][2]| select(.[11][0][0] != null)| [.[1][1], .[1][4][0], .[11][0][0] ]|@tsv’Google Task Data – All Together Now!
All that’s left is to join the two result files together. You could certainly do this using jq as well, but for my use case, I wanted to graph the results in Excel. I simply pasted the data into two separate sheets and used a VLOOKUP to map the email addresses to the completed tasks by numeric User ID.
Hopefully Google will implement an API sometime this decade and remove the need to do all the JSON juggling. For more ways to use jq within an Information Security context, see our article on parsing ScoutSuite results.
More From White Oak Security
White Oak Security is a highly skilled and knowledgeable cyber security and penetration testing company that works hard to get into the minds of opponents to help protect those we serve from malicious threats through expertise, integrity, and passion.