Hi, again folks! Welcome back, I am a Senior Threat Emulation Specialist at White Oak Security. The majority of my time in the Cyber Security field has been focused on Red Team Operations and Social Engineering. In our Phishing For Success series (part 1 and part 2), we introduced some of the common pitfalls and raised awareness about the risks of conducting a phishing campaign.
In this part 3 post, we will focus on some practical steps to building out phishing infrastructure. This topic has been the subject of many blog posts. I do not believe in recreating the wheel just to look cool. The purpose of this blog is to teach you how to create and use automated tools that empower you to bypass email security defenses. I created the autosneakphish tool to make this easier for you in conjunction with this part 3 blog.
Phishing Infrastructure Setup
As red teamers and social engineers, our time is money. Every second you spend building out your infrastructure reduces the time you spend testing your client’s security posture and identifying issues and vulnerabilities. Professionals in any field want to deliver the best return on investment that they can to their clients. The solution I have ended up using has allowed me to deliver great results for clients with little setup time. I prefer to automate my setup using a combination of Amazon SES and GoPhish. With very minimal effort, you can also use Terraform to turn this into a nearly effortless setup and reduce the setup time to minutes. We will break down each of the important steps involved. I also want to give some respect to those who have worked hard to teach their skills to others and will be shouting out some of the blogs I have used over the years to refine my phishing infrastructure.
Amazon SES
Why I use Amazon SES instead of setting up my own SMTP server:
- SES setup is simple and fast
- SES grants legitimacy to your SMTP server and assists in bypassing security controls
- SES removes the need to set up redirectors
The benefits of using Amazon SES for your SMTP server apply not only to infrastructure setup, but even to evasion! Evading leading tools like Proofpoint or even Google/Microsoft email security is not a simple yes or no situation. Emails are rated by these security tools across a range of characteristics. The focus of this blog is on infrastructure, but we will flesh out all the details of evading Proofpoint and other email security tools in our next Phishing for Success Part 4 post so stay tuned for it!
How do I set up Amazon SES?
All you need to do is follow this simple guide. This guide by Jim Lamb is pure gold, simple and straightforward. Where it falls short, from a red teaming perspective, is that it does not touch on opsec since it was used from an internal phishing test perspective and did not need to evade security controls.
Creating Amazon SES Phishing Infrastructure Steps:
- Route53 – Buy a domain
- Route53 – Create a hosted zone
- Route53 – Create DNS records
- EC2 – Create an Ubuntu server
- EC2 – Create a Security Group
- EC2 – Create an Elastic IP and assign it to your server
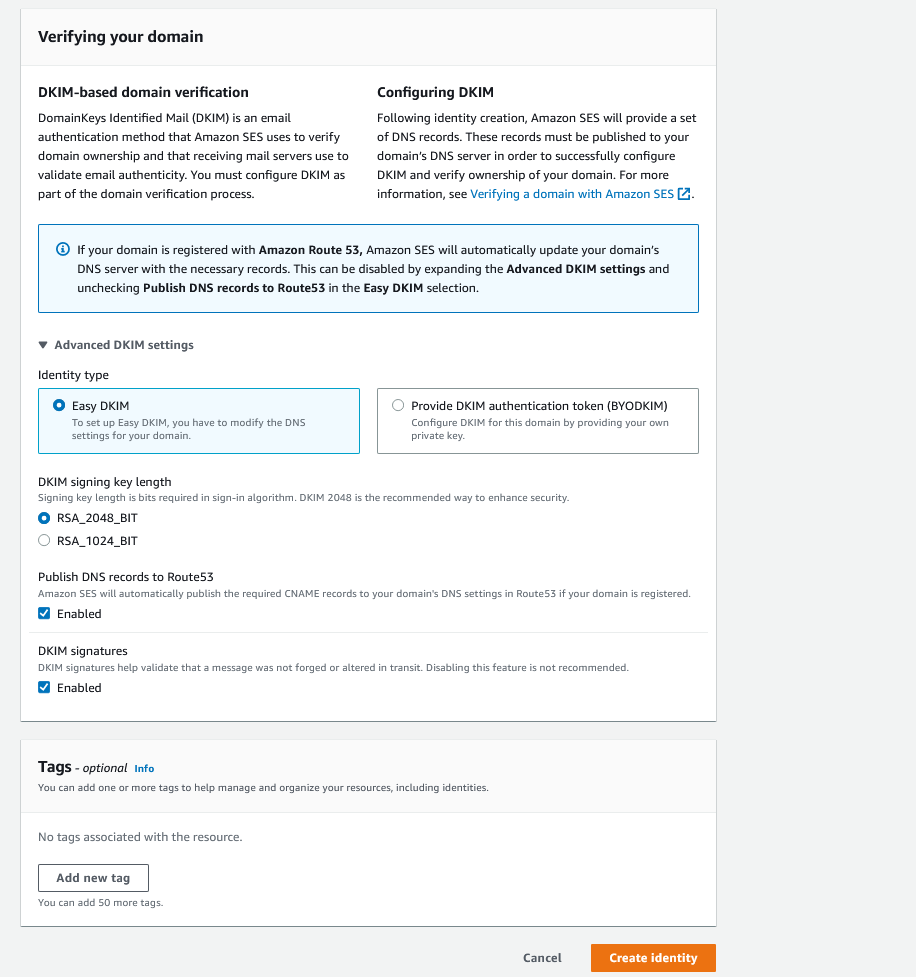
- SES – Configure a Verified Identity
- SES – Publish DKIM records to Route53 hosted zone
I will not go into any detail about working with Route53 or EC2 in the console. Many guides exist on the internet and it is really very intuitive.
A lot of people are less familiar with SES, so I will show in screenshots what you need to do to configure the entity and automatically publish the DNS records needed to your Route53 Hosted Zone.

That’s it…boom. Your infrastructure is ready! Now it is time to build out your GoPhish server.
1 phish, 2 phish, GoPhish, SneakPhish
GoPhish is my favorite open-source phishing tool. It is written in one of my favorite languages, Golang. You can build from a source or just download the latest binary release and run it, simple and fast. You can take a look at their GitHub repo here. They were also very responsible and left little IOCs (Indicators of Compromise) in their application that must be altered before use for any serious evasion to be possible. One of the reasons creators of offensive security tools leave IOCs (indicators of compromise) behind is to prevent the abuse of the tool by low-skill threat actors. If you are a red teamer or social engineer and you need to bypass or evade security tools, then you will need to grab the source and do some heavy modifications. There is an exceptional guide to making GoPhish sneaky, which can be found here. Any changes you do make to the source code need to be unique! Do not simply copy and paste what others have done or you will not be sneaking by anything.
Here is a simple list of the things you must change if you want a chance at evading security tools:
- Create unique email headers
- Change the server name sent to the browser to a unique value
- Change the server name sent with emails to a unique value
- Create a unique 404 page
- Remove standard GoPhish headers and replace them with unique headers
- Create a unique tracking parameter.
After this, you still need to pay attention to email bulk filtering. Ideally, you would keep your traffic low and slow to keep email defenses from deciding the sender is sending bulk emails. If Proofpoint notices this behavior, most of your phishing emails will be caught. Until GoPhish is patched to allow manual control of sending speed you have two options – you can modify it yourself or you can create small user groups and launch them as separate campaigns. Typically sending more than 10 emails in a short period of time is pushing your luck with Proofpoint.
We will get into how to create landing pages and email templates that will evade security controls in Phishing for Success part 4!
Terraform Goes Brrrr!
Terraform can take your build process from hours to minutes with a minimal bit of initial effort. It is an open-source infrastructure as a code tool. I want to shout out my first learning experience with Terraform, Red Barron. Aside from the frightening picture, I can highly recommend this GitHub repo as a starting point for creating your red team’s infrastructure as code.
What do you need to do to create a SES + GoPhish Terraform setup tool?
- Create EC2 instance for GoPhish Server
- Install your customized GoPhish Server on the EC2 instance
- Ensure you have a domain registered in Route53
- Add MX records for the domain to Route53
- Create the SES domain identity and associate it with the Route53 record
- Test the SES and remove it from the Sandbox
- Run an ansible playbook to build out your GoPhish server
Once these are all implemented into your Terraform code you can spin up or spin down a new GoPhish server that is ready to bypass security controls in no time! Log into your newly created GoPhish server and put in your SES username and password and you’re good to go.

Autosneakphish
To make my life (and yours) easier, I have created autosneakphish, an automated evasive phishing infrastructure tool. This tool will allow you to automate the process that I have described above.

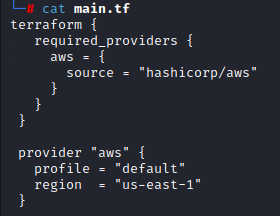
Terraform configuration files consist of JSON data. In main.tf we define the provider (in this case AWS) as well as the AWS provider profile and region we are going to use. You will need to make sure that you utilize a profile with a VPC that already has subnets created.
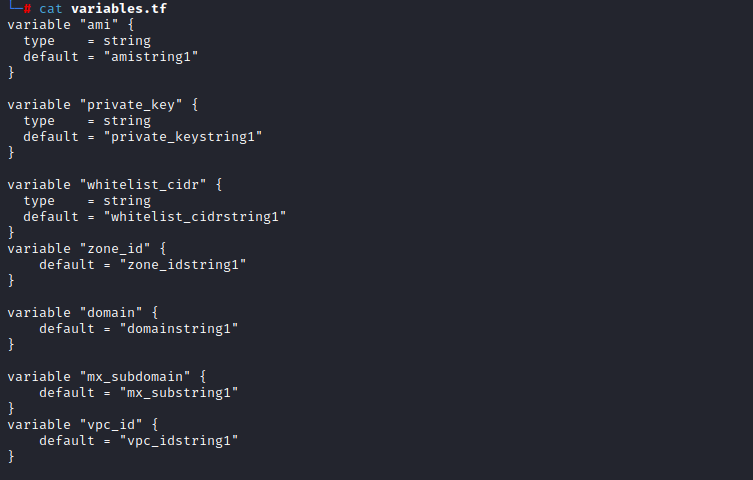
In variables.tf we define the remaining values that will be used by the remaining Terraform files to build the infrastructure. These variables will be modified by autosneakphish.py as needed. You will not need to manually modify any of these values.
In instances.tf we define our autosneakphish server instance and utilize provisioner to run our ansible playbook.

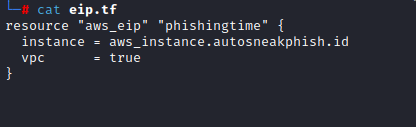
In eip.tf we create a public AWS elastic IP to be utilized by our autosneakphish server.
In data.tf the vpc id is declared as well as the AWS region. Ensure that the vpc id that you choose during the running of autosneakphish.py matches the aws profile you are using.

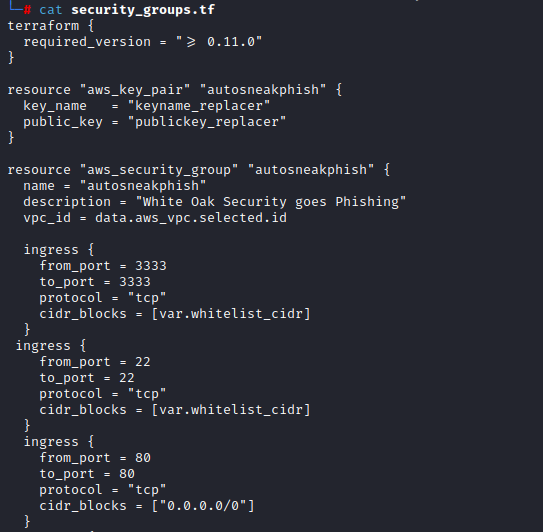
In security_groups.tf we create a security group for our autosneakphish server.
In ses.tf a smtp user is created and the SES domain identity is created.

Also, we publish the necessary domain records to our chosen domain in Route53.

Autosneakphish includes default outputs.tf file as an example of how to output resources to the command line after running Terraform.

To install and configure the autosneakphish server an ansible playbook is utilized.

The ansible playbook also downloads some modification files for GoPhish from the downloads folder.

The details on how to modify GoPhish reside in the ansible playbook. Let’s take a look at the ansible playbook:

The ansible-playbook utilizes ansible built-in modules to install programs download files and run shell commands. These will bring the autosneakphish to readiness but not finish the configuration of the server or start it. The ansible playbook will be modified by autosneakphish.py to ensure the basic configuration is congruent.
The ansible downloads will be used to modify the GoPhish source code to enable a custom 404 error to eliminate a potential source of detection by defenders.
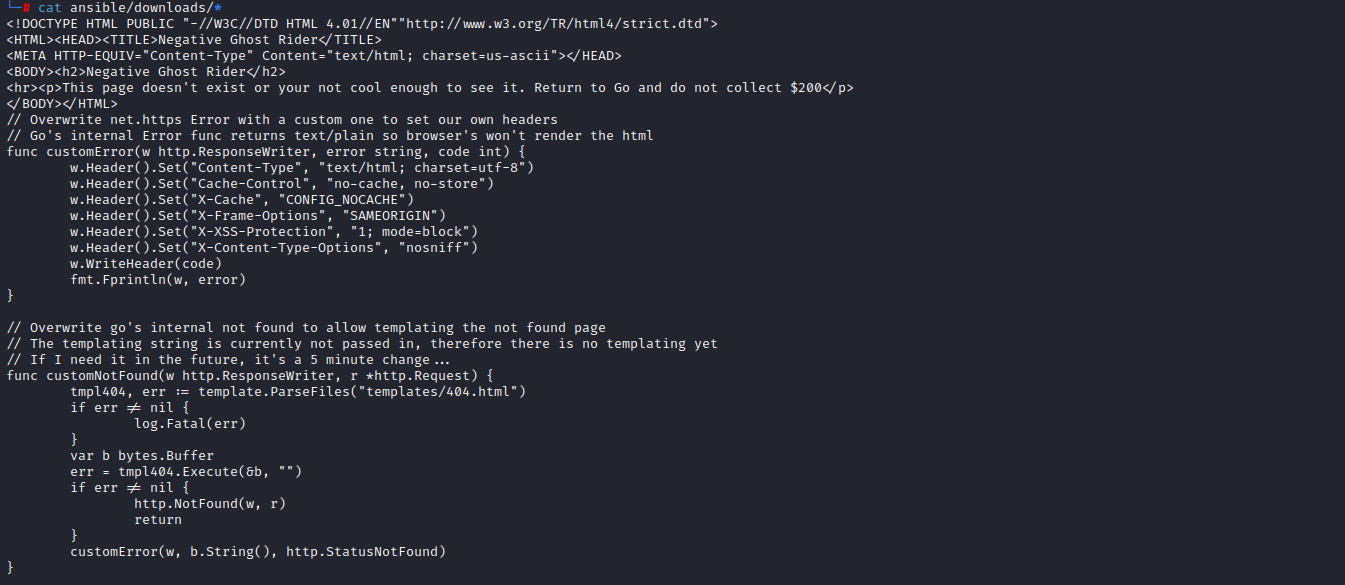
The 404.html file will be modified by autosneakphish.py to enable a custom message for your autosneakphish server.
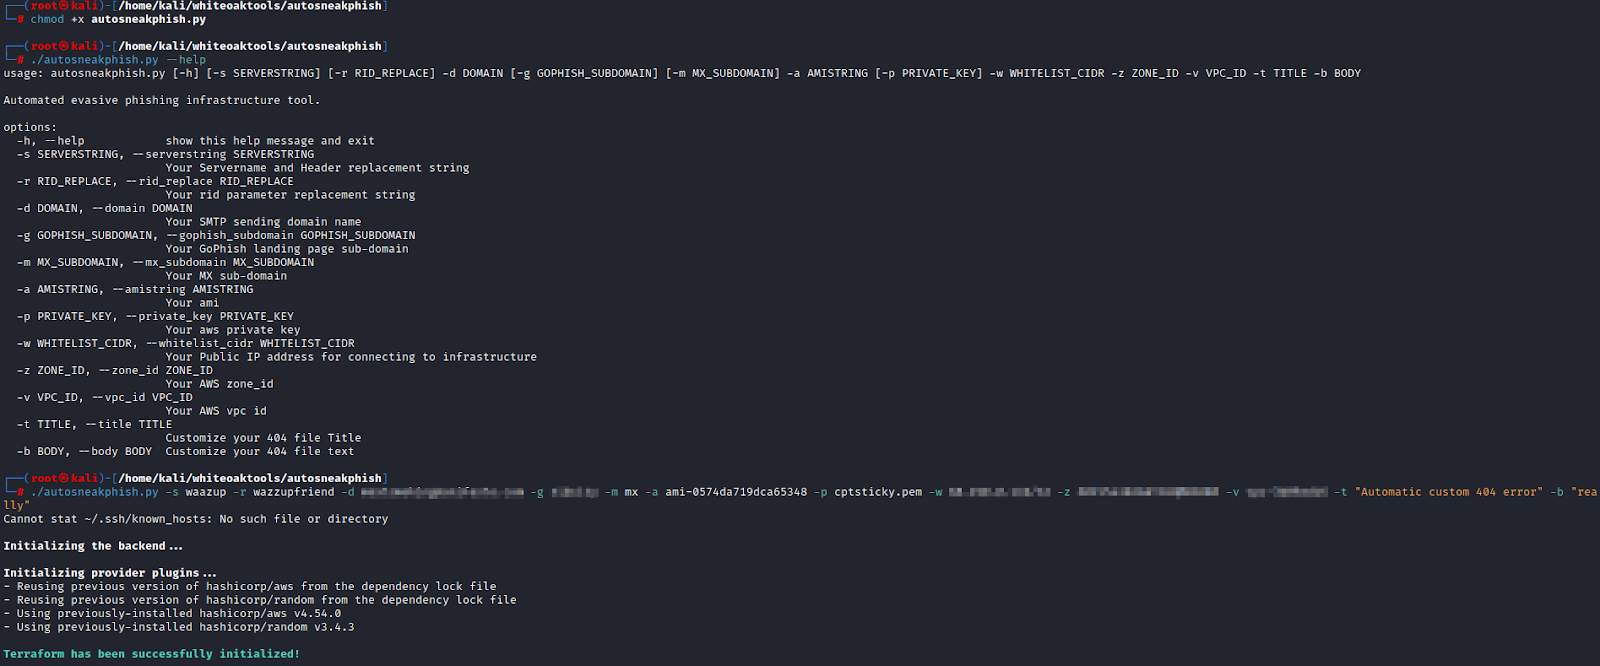
Autosneakphish utilizes a python script to ensure all necessary tools are installed and configured correctly. If everything is configured correctly it will begin building your infrastructure via Terraform, ansible, and a bash script. The total time to completion should be around 5 minutes or less.
Phishing For Success 3 Conclusion
Today, we’ve demonstrated using Amazon SES and GoPhish to create an infrastructure that can bypass security tools. Additionally, we touched on the use of Terraform to make the process of building out your infrastructure very easy and fast. I am very grateful for all the great red teamers and social engineers who have written blogs on this topic. I owe practically all of my knowledge about building out infrastructure to them! There are unlimited combinations of infrastructure that can handle this task and I have only spoken about my favorite combination.
To help those who want a jump start, we have released our tool autosneakphish in conjunction with this blog. I hope it serves you as well as it has served me!
More From White Oak Security
White Oak Security is a highly skilled and knowledgeable cyber security and penetration testing company that works hard to get into the minds of opponents to help protect those we serve from malicious threats through expertise, integrity, and passion.