[HERE’S A COMPANION POST ON SETTING UP AN ANDROID DEVICE FOR PENETRATION TESTING]
One of the initial challenges of performing an iOS mobile application penetration test is getting a suitable test environment setup. One of the easiest ways to do that is obtain a used or cheap iOS device. Apple has a much longer support period for current iOS versions so it is possible to test with a wider range of phones.
However, even with these benefits, there are several security mechanisms within iOS that prevent some mechanisms that would be helpful for penetration testing. While it is possible to proxy app and web traffic through an interception proxy without breaking these security controls, full OS access to install software such as SSH allows for a greater level of control.
This guide is meant to be comprehensive and provide an easy walkthrough on how-to setup an iOS 13 device for a pentester or pentesting team to easily test iOS applications in the future. This will cover the following steps:
- Preparing the iOS device and local computer
- Jailbreaking the iOS device
- Installing Cydia and OpenSSH
- Installing man-in-the-middle certificates for interception proxies like Burp Suite Professional
NOTE: These steps will not erase the phone, but be sure to save any data in case of corruption. If setting up an already jailbroken device for a new user’s Burp certificate, skip to the ‘Interception Proxy Certificate Install’ section. In addition, it is recommended to not use your everyday phone as a penetration testing device. Several of these steps outlined below will purposefully lower the security posture of the device.
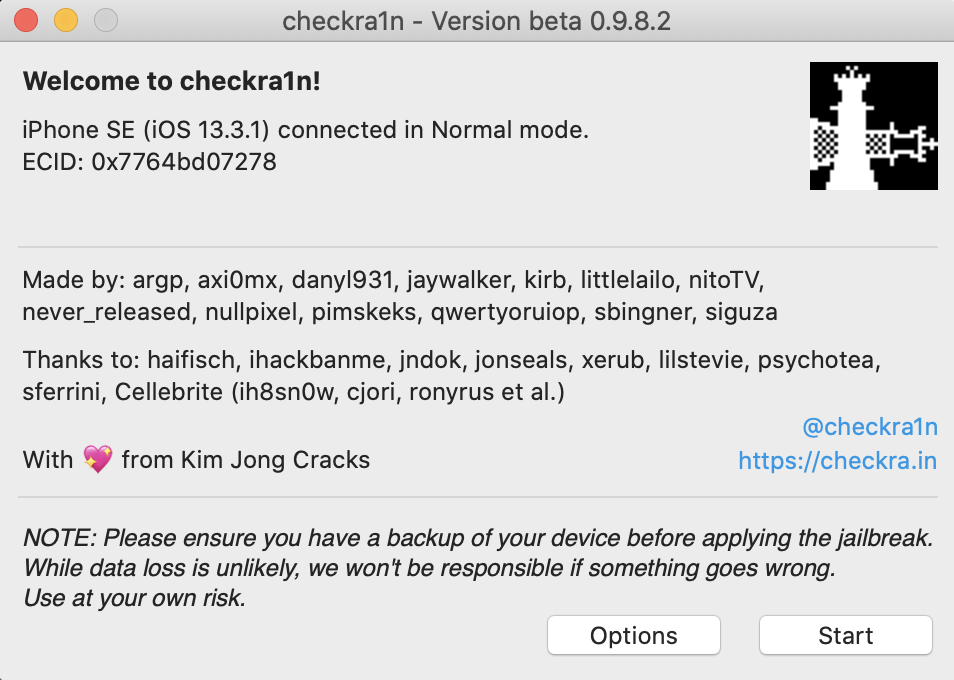
All steps below were performed on an iPhone SE running on iOS 13.3.1, with the computer running MacOS 10.15 Catalina. Steps can be somewhat extended to similar devices, such as Linux or different iOS devices.
Install Software on Computer
Download the checkra1n software onto your Mac or Linux OS. https://checkra.in
Jailbreak (checkra1n) Instructions
Jailbreaking is the process of accessing a greater amount of operating system functions on a iOS device. The checkm8 exploit (using the checkra1n application) takes advantage of a hardware issue that allows a jailbreak on modern iOS versions. It does not work on the latest iOS devices due to a different hardware architecture (iPhone XS and newer), but it should work for several devices prior to that prior to that. If need be, there are other jailbreak software versions available for older iOS devices.
Connect the iOS device to the computer via USB.
Startup the checkra1n application.
Click Start.
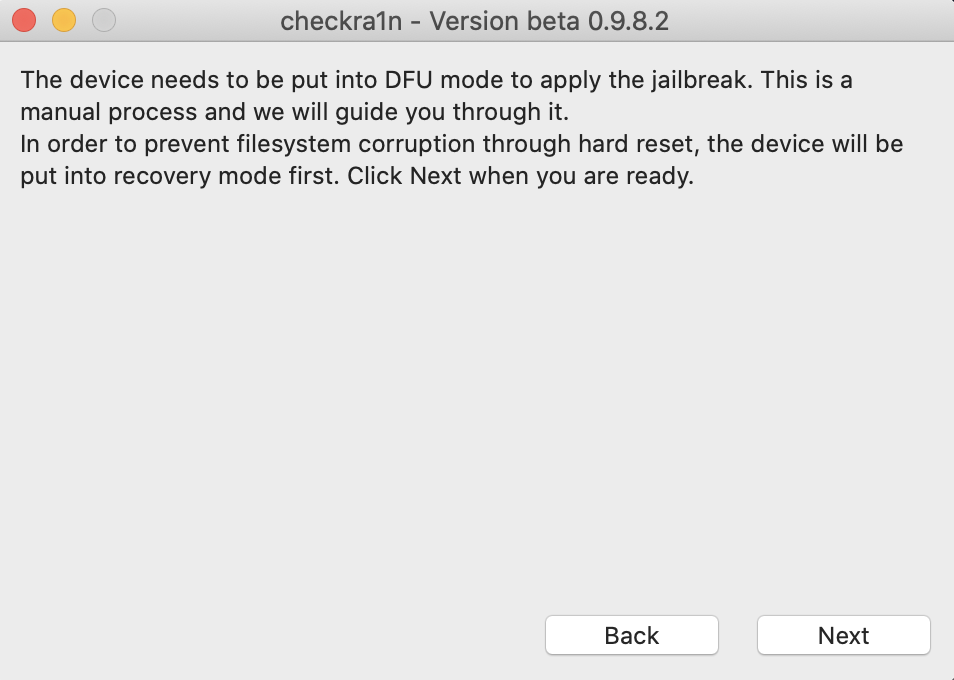
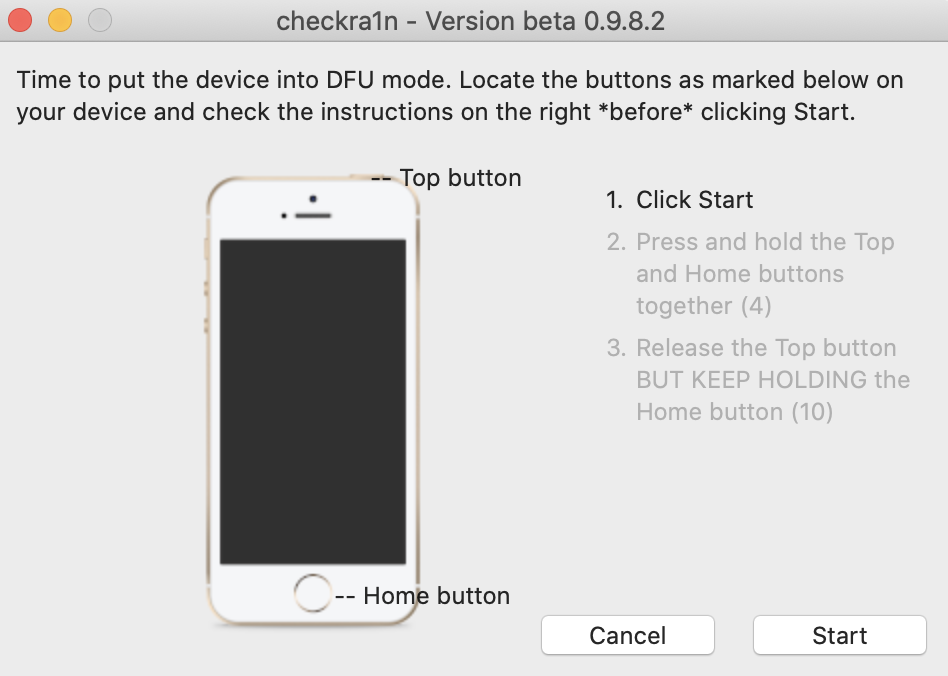
Follow the instructions within the checkra1n software to get the phone into a proper recovery mode for the jailbreak to work. For the iPhone SE in this example, it requires the power button and Home button to be pressed and released in a certain sequence.
When the jailbreak is in process, various images will flash across the screen of the iOS device. The device will restart at the end of the jailbreak. The process was successful when the checkra1n app is installed on the iOS device.

Note: This exploit will no longer work when the device reboots. Any other settings or programs that are setup after the jailbreak will be maintained but will not be functional. To re-enable the jailbreak and restore any custom functionality, run through the steps in this section again.
Cydia and OpenSSH Setup
In order to facilitate some basic testing functions on the phone, setting up the Cydia app store will assist in easily setting up necessary packages. This section will cover installation of the Cydia app store and the OpenSSH client.
Tap the checkra1n app.
Tap the Cydia icon to install.
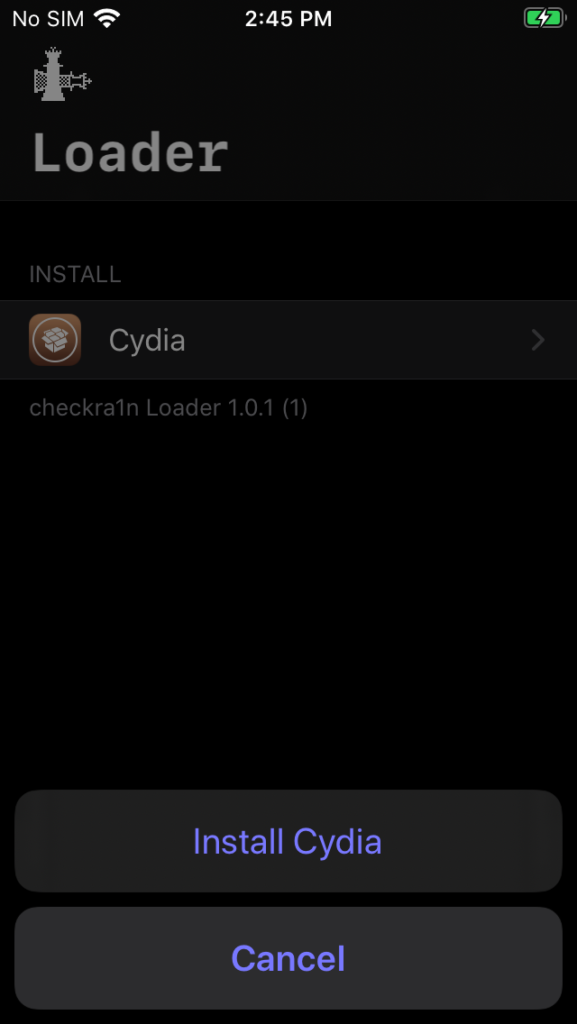
Cydia should now be installed on the phone. Tap the Cydia app.

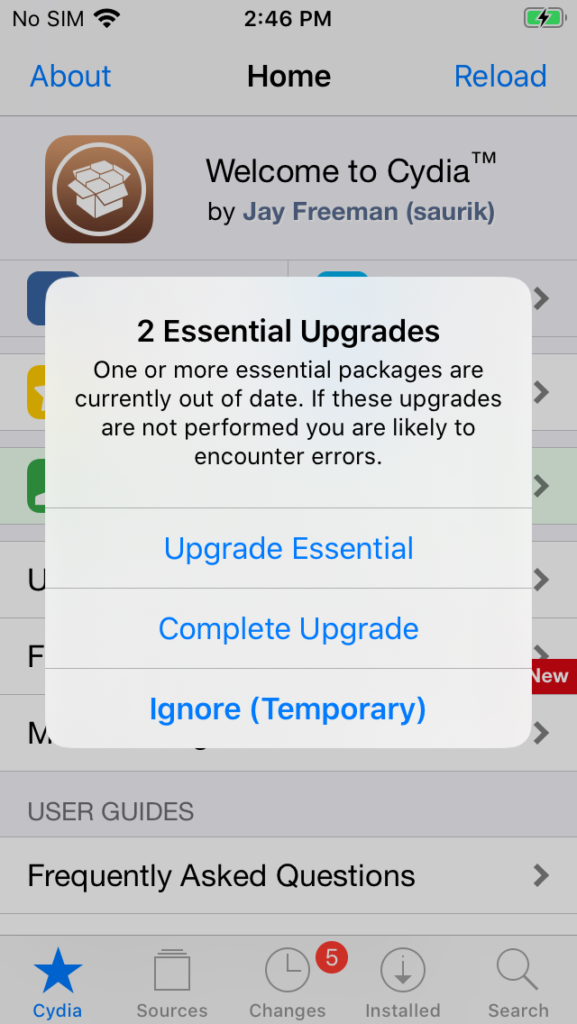
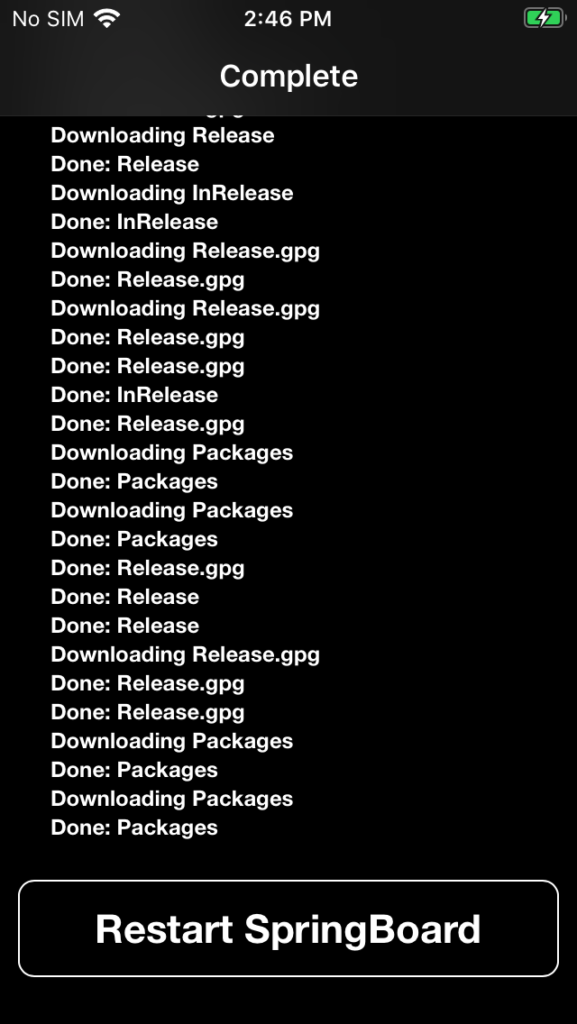
If necessary, tap either the Upgrade Essential or Complete Upgrade options to upgrade Cydia components. Tap to Restart SpringBoard after installation.
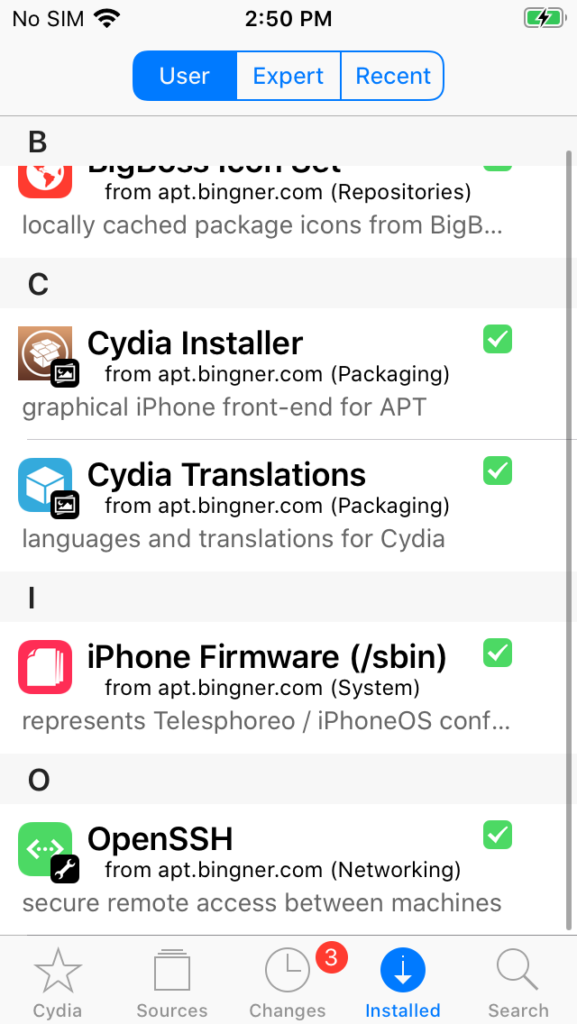
Search for ‘OpenSSH’ using the Search function in the lower right corner. Tap the ‘Install’ button in the upper right.
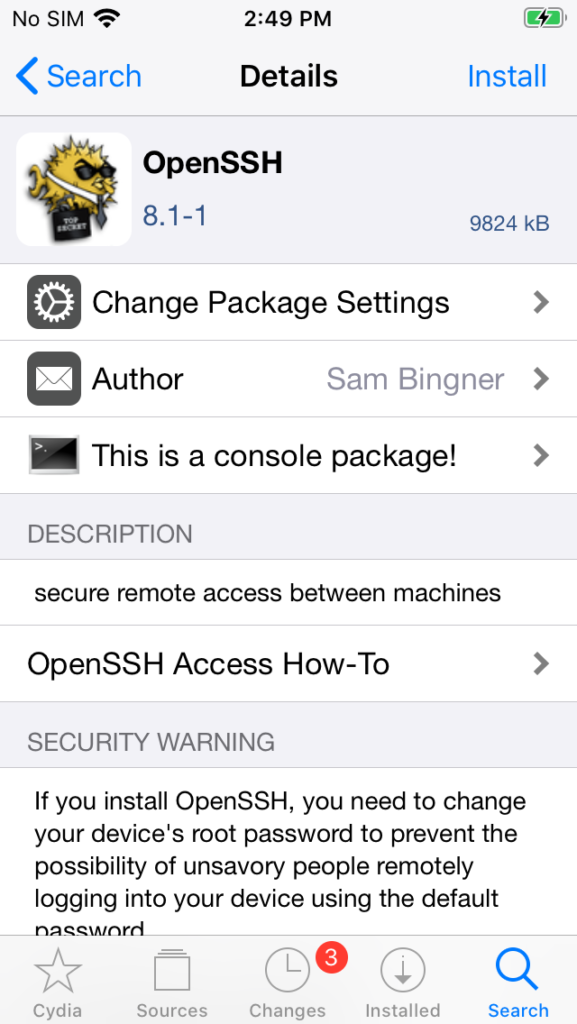
To verify the OpenSSH installation, tap the ‘Installed’ function in the lower right to find the OpenSSH library.
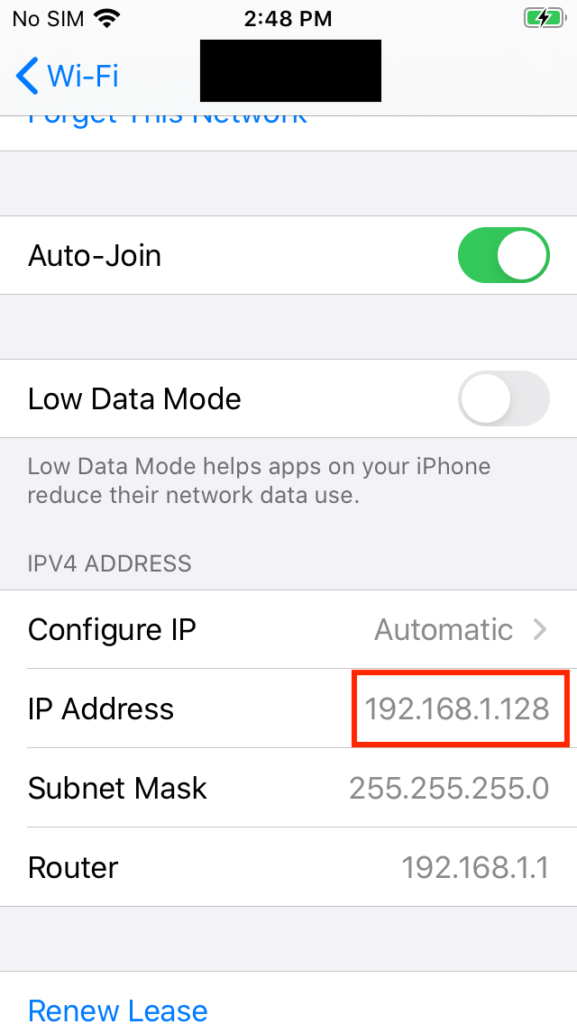
To SSH from the computer to the phone, the IP address of the iOS device will need to be ascertained. On the iOS device, tap Settings > Wi-Fi, and tap the ‘i’ next to the currently connected Wi-Fi network.
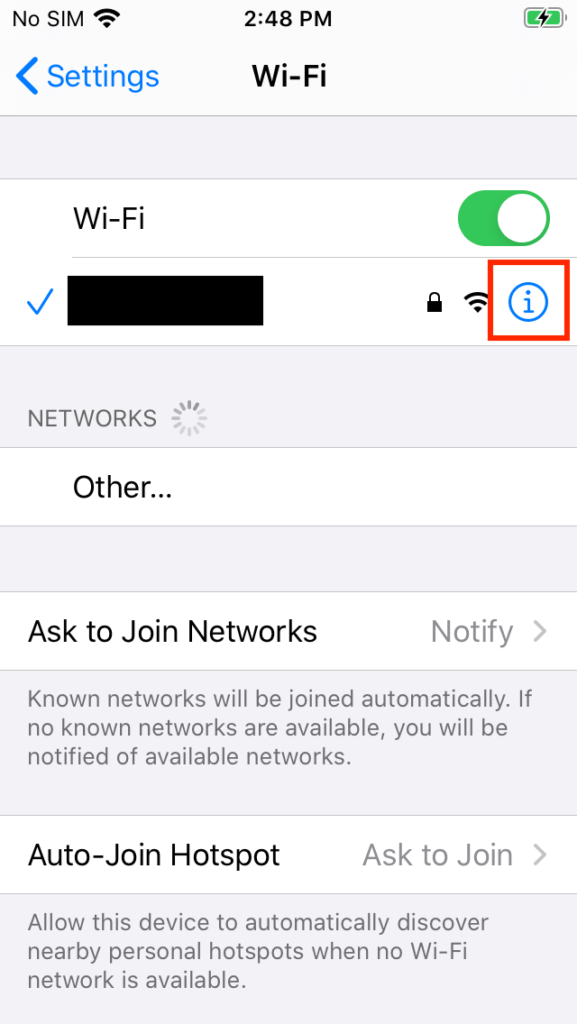
Scroll down and take a note of the IP address currently assigned to the iOS device.
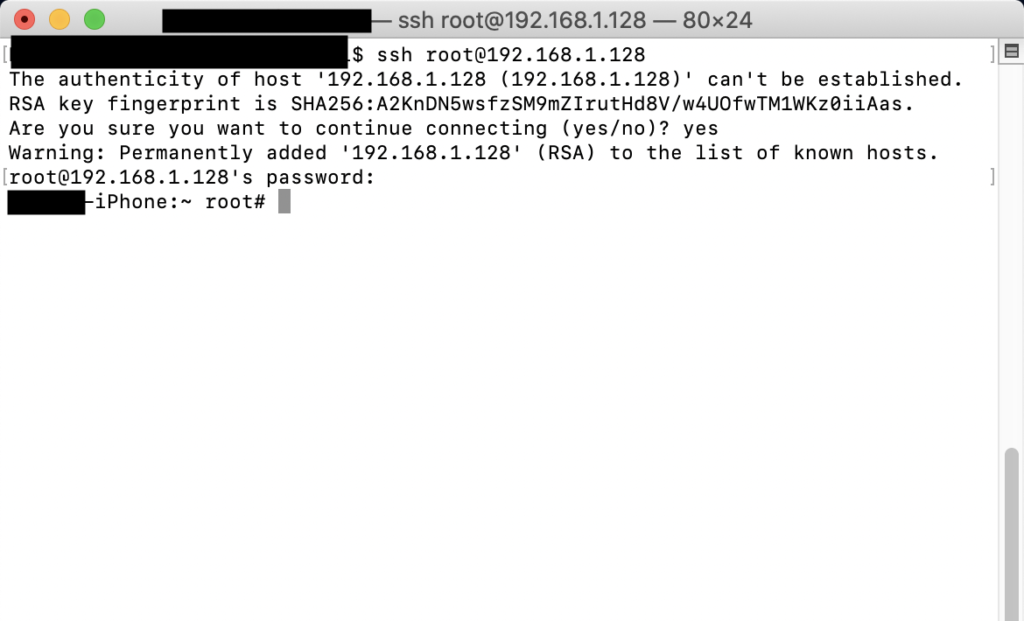
Open a terminal or SSH client on your local computer and SSH with the root user account to the iOS device’s IP address. It will take a minute for the keys to generate the first time. When prompted for a password, use ‘alpine’. It is recommended to change this password once the device is fully setup.
Interception Proxy Certificate Install
These steps will follow using Burp Suite for the interception proxy, but the same steps can be applied to any other similar tool. To get the certificate installed, Burp needs to be running and setup for the following steps to work. Ensure that both the computer and iOS device are running on the same network.
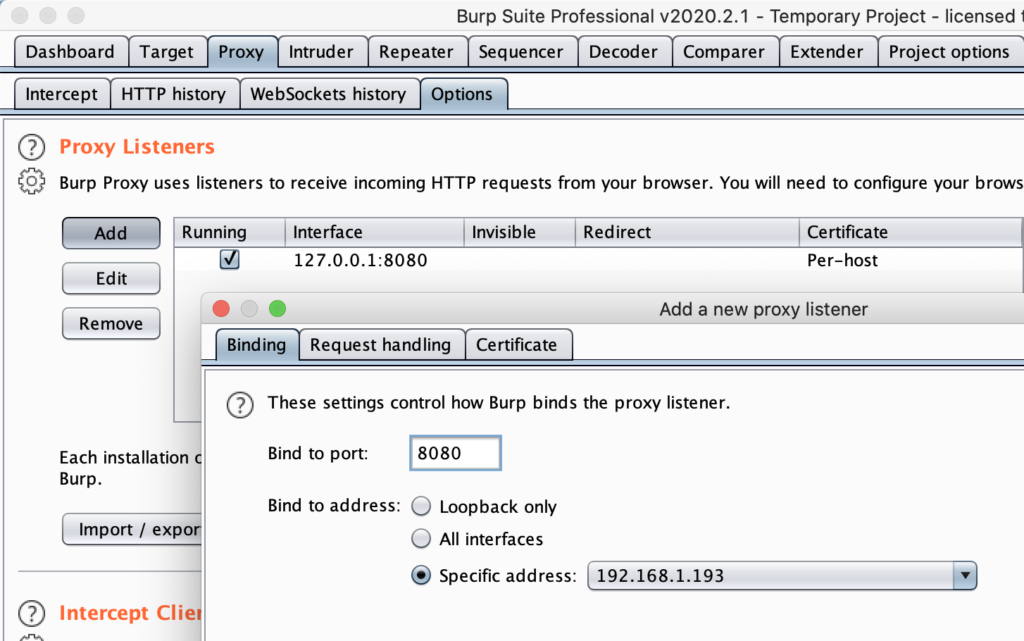
After starting up Burp Suite on the computer, click the Proxy tab. Then click the Options tab.
Click Add.
In the ‘Specific Address’ drop down, select the IP address that is on the same network segment as the iOS device. Type in a port number (such as 8080) and click Ok.
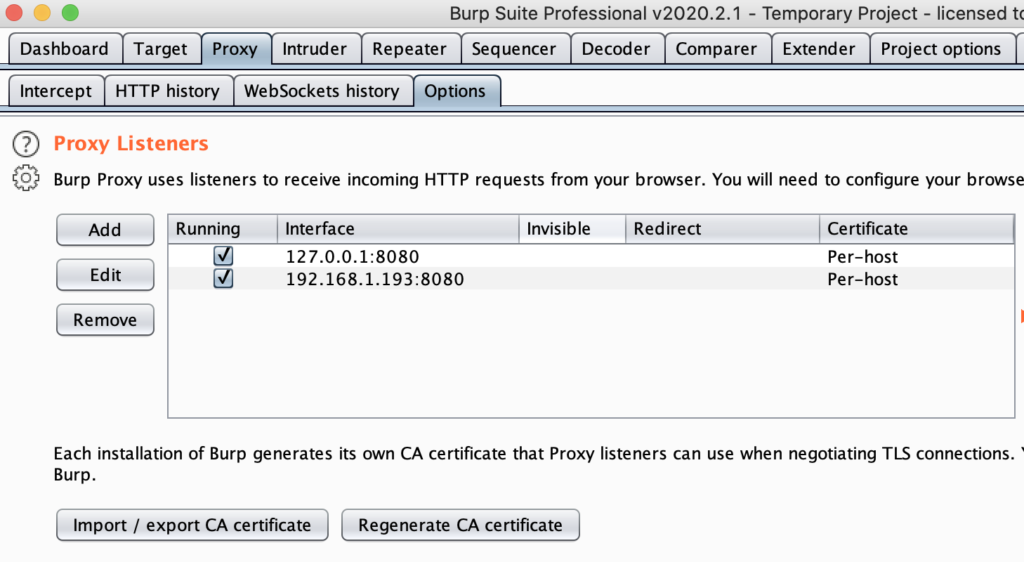
Confirm that a new proxy interface was added.
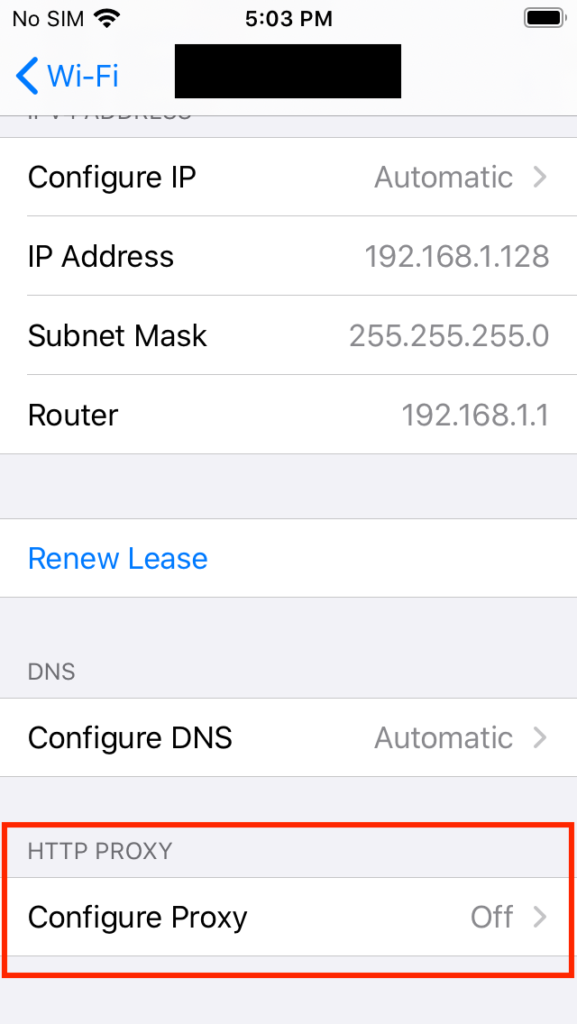
On the iOS device, tap Settings > Wifi > Tap the ‘i’ next to the current Wifi network
Scroll down and tap ‘Configure Proxy’
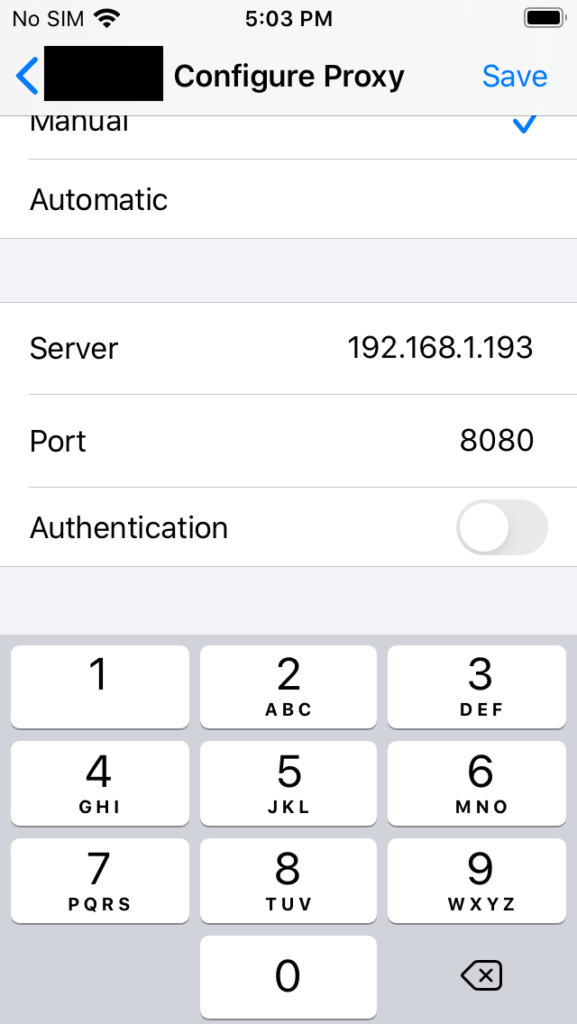
Type the IP address and the Port number of the interception proxy config setup earlier and then tap Save in the upper right corner.
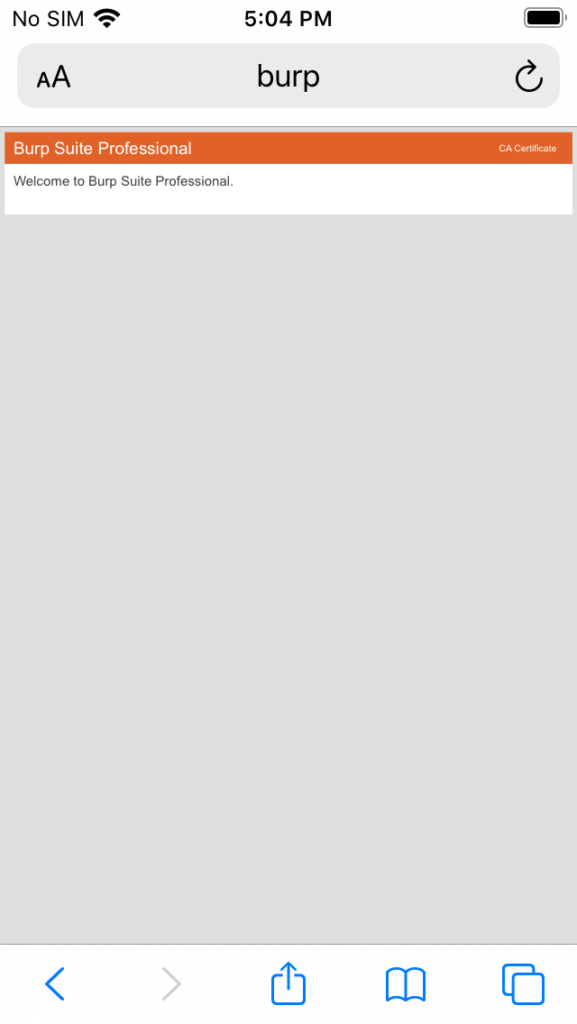
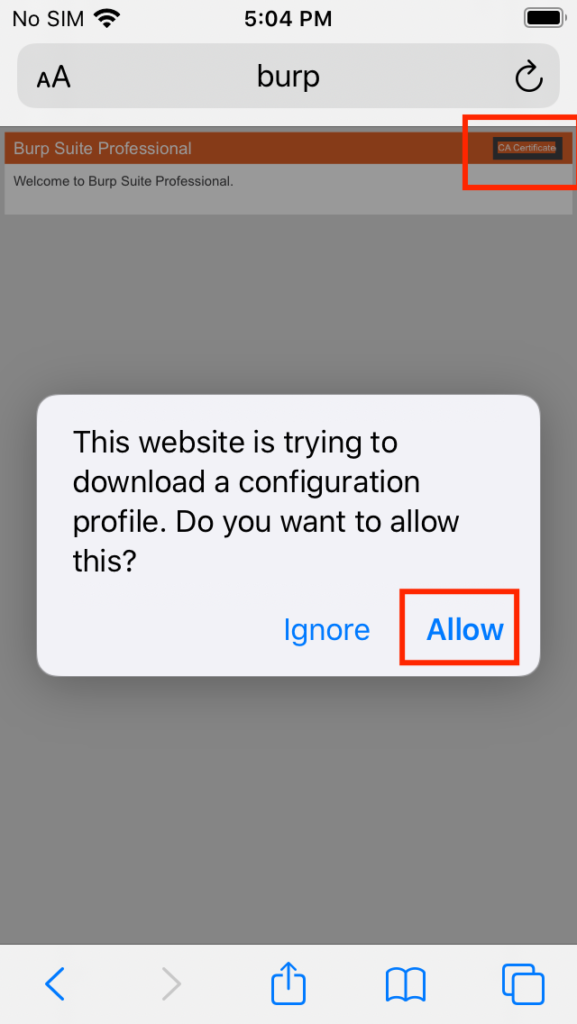
Open Safari on the iOS device and type http://burp.
Tap the ‘CA Certificate’ text in the upper right corner and then tap Allow.
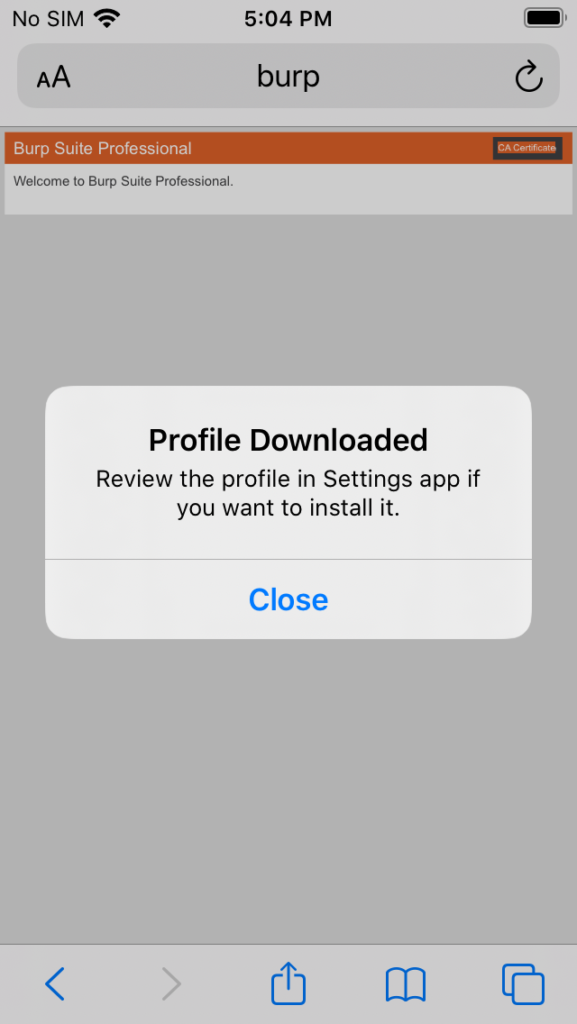
Tap Close.
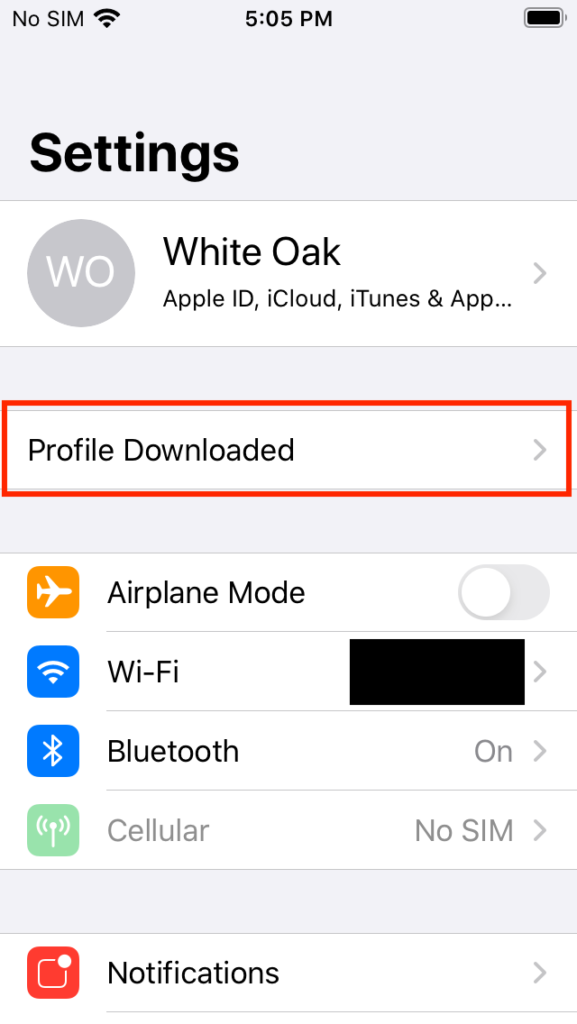
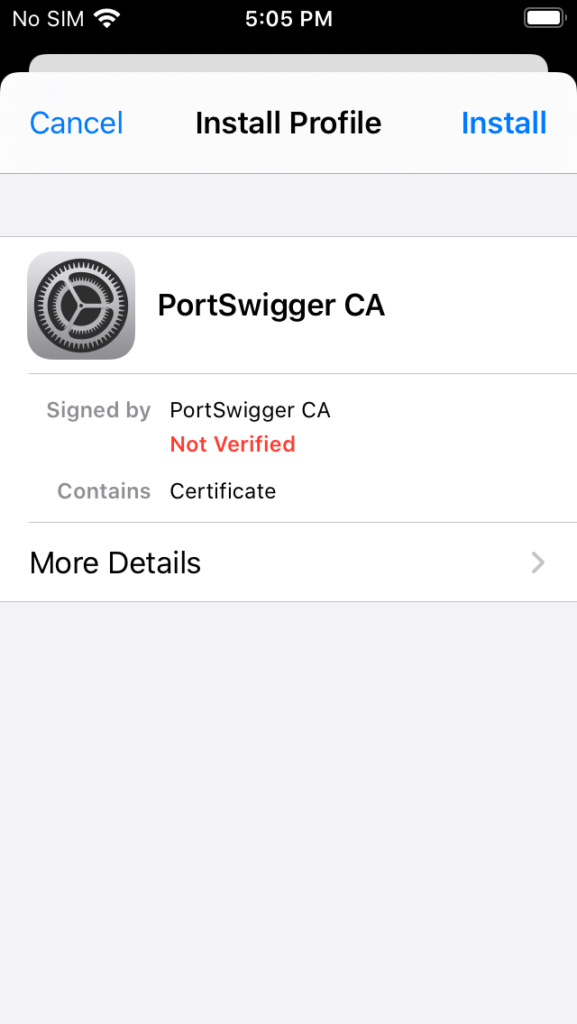
Open Settings and tap the newly appeared Profile Downloaded section.
Tap Install.
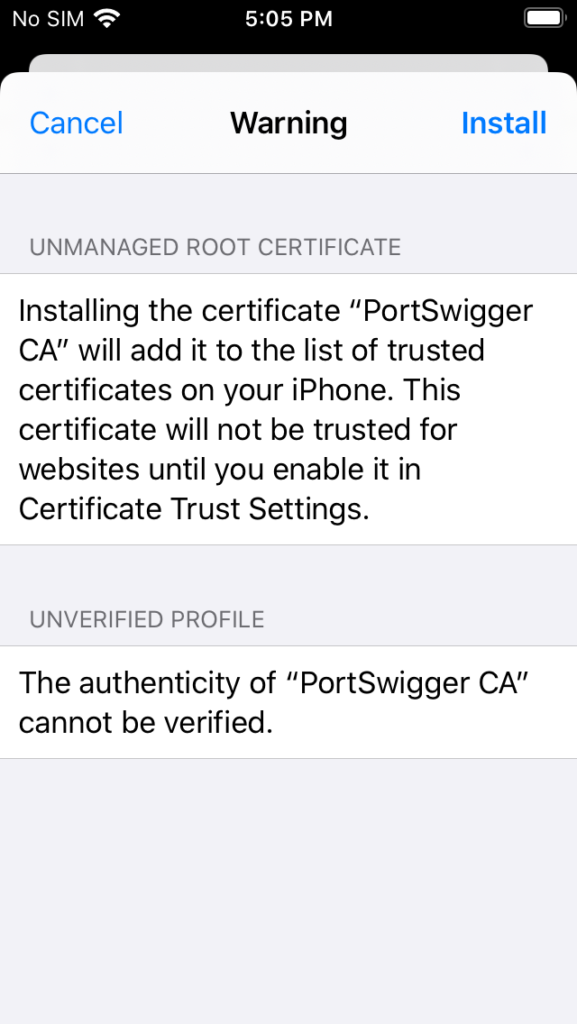
Tap Install again.
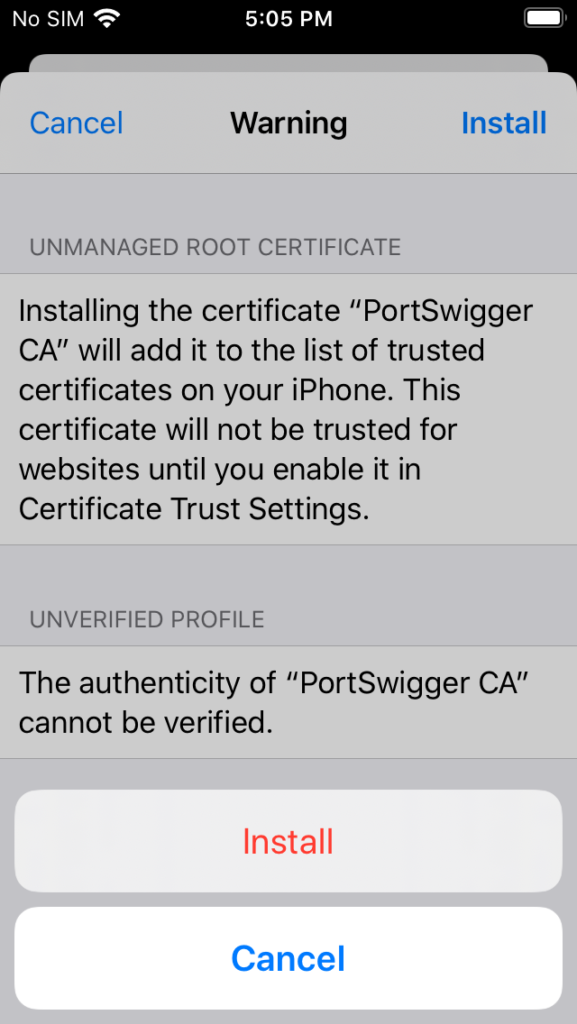
Tap Install for the third time (Apple wants you to be sure).
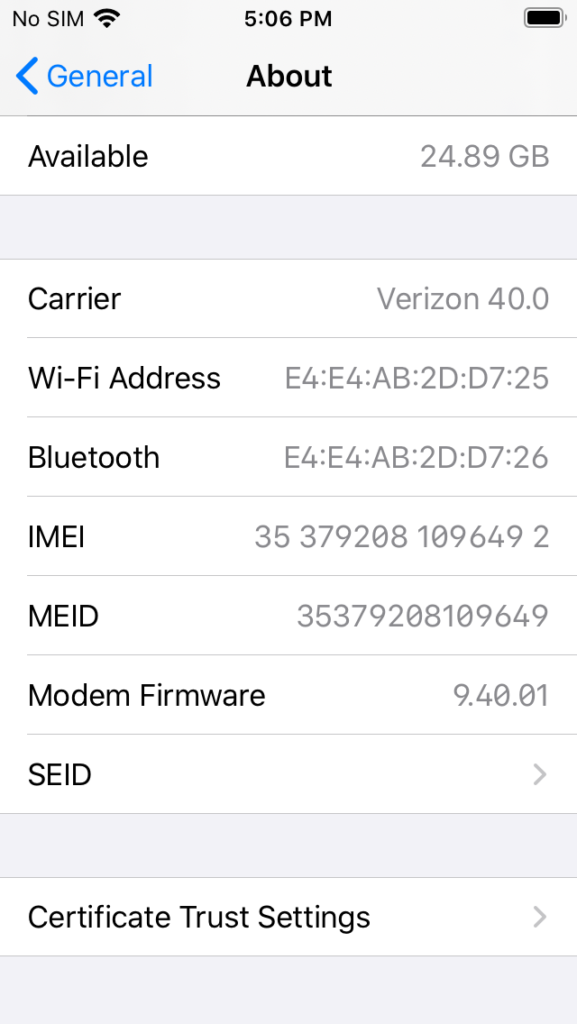
Back in the Settings app, tap General > About.
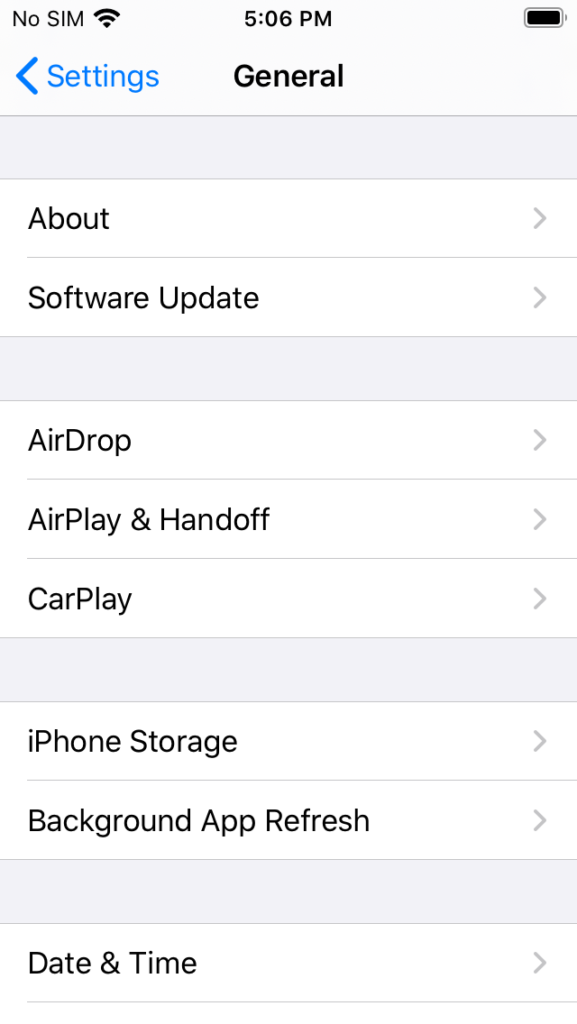
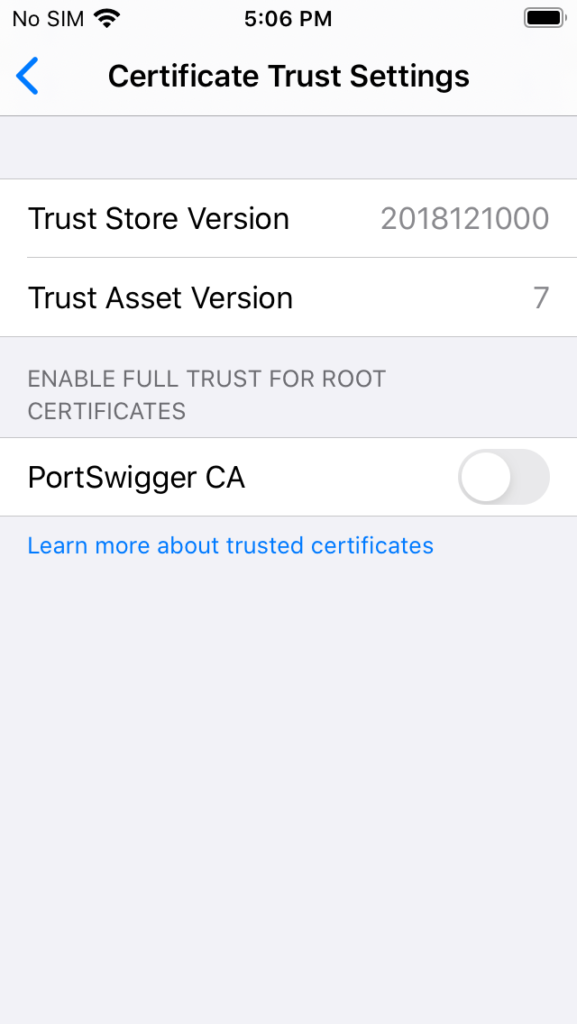
Scroll down to the bottom and tap Certificate Trust Settings.
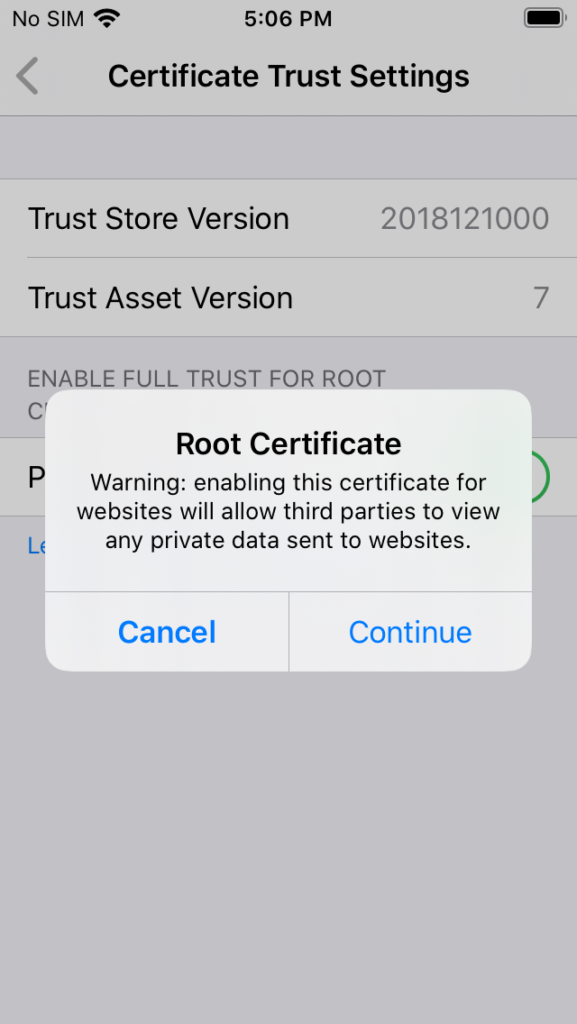
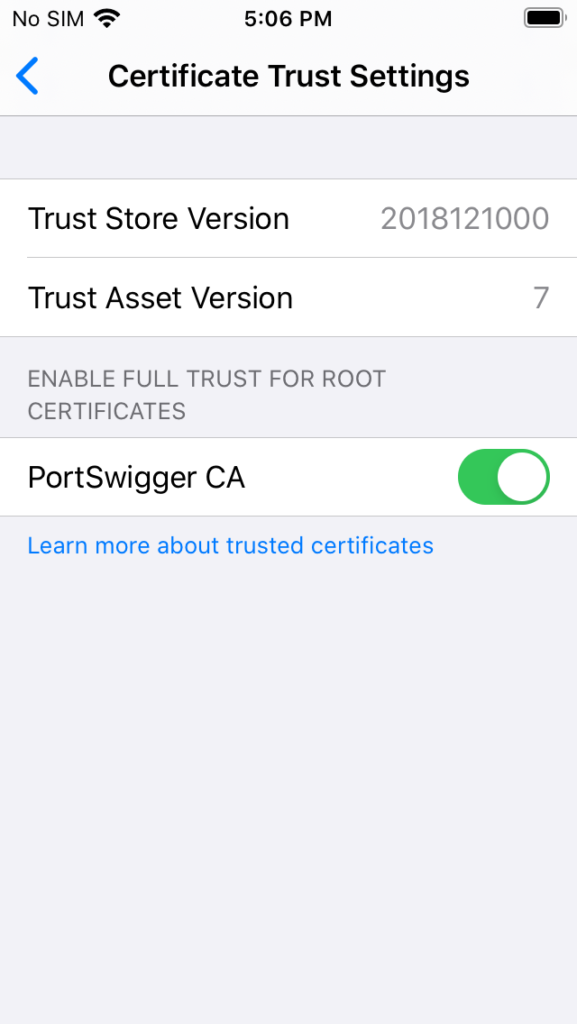
Tap the slider next to the newly installed certificate for Portswigger CA.
Tap Continue.
At this point, it should be possible to proxy both Safari and app HTTP traffic through the intercepting proxy. Test it out with loading an app and attempting to proxy some traffic.
At this point, only this section is required for future certificate installation. No other unlocking or rooting steps need to be completed on the iOS device unless the device has been rebooted. If the device has been rebooted, the checkra1n program will need to be run again for programs like Cydia and OpenSSH to work again.

Conclusion
The phone can now be setup to proxy through the intercepting proxy or can run multiple tools that all require root access. While this setup is a basic start to pentesting iOS applications, it leads to an easier setup for tools of other apps like frida, passionfruit, and keychain-dumper. For a sample of where to start, begin with the OWASP Mobile Security Testing Guide.
If you are interested in setting up an Android device for penetration testing, check out https://whiteoaksecurity.com/blog/2020/2/25/android-10-device-setup-for-penetration-testing.